How to Install Nucleus Colony Bees
Installing your honey bees into their new hive can be a quick and rewarding process. Follow these instructions to ensure that you and your bees are ready for the big moment.
Pre-Installation Prep
Make sure you're prepared for your bees! Ensure all equipment is assembled, painted and placed in the bee yard before your bees arrive. Make sure you have all the necessary equipment ready to go; protective gear is clean and ready, hive tool is near. Don’t forget to have bee feed and a pollen substitute at the ready, too!
Caring For Your Bees Before Installation
Follow the instructions below or print our installation guide.
It’s important to install your bees as soon as possible. If you are going to transport your bees, make sure they are strapped securely and are NOT covered in a blanket or winter wrap otherwise the bees will overheat.
If you are unable to install your bees right away, keep them in a dark, quiet place, preferably around 50°F – 70°F. Do not chill or overheat your bees.
Feed your bees by generously spraying or brushing Pro-Sweet, a 1:1 water/sugar syrup, or 1:1 water/high fructose corn syrup mix on the screen sides 3-4 times a day.
Step 1: Add smoker fuel to your smoker and light it before starting.
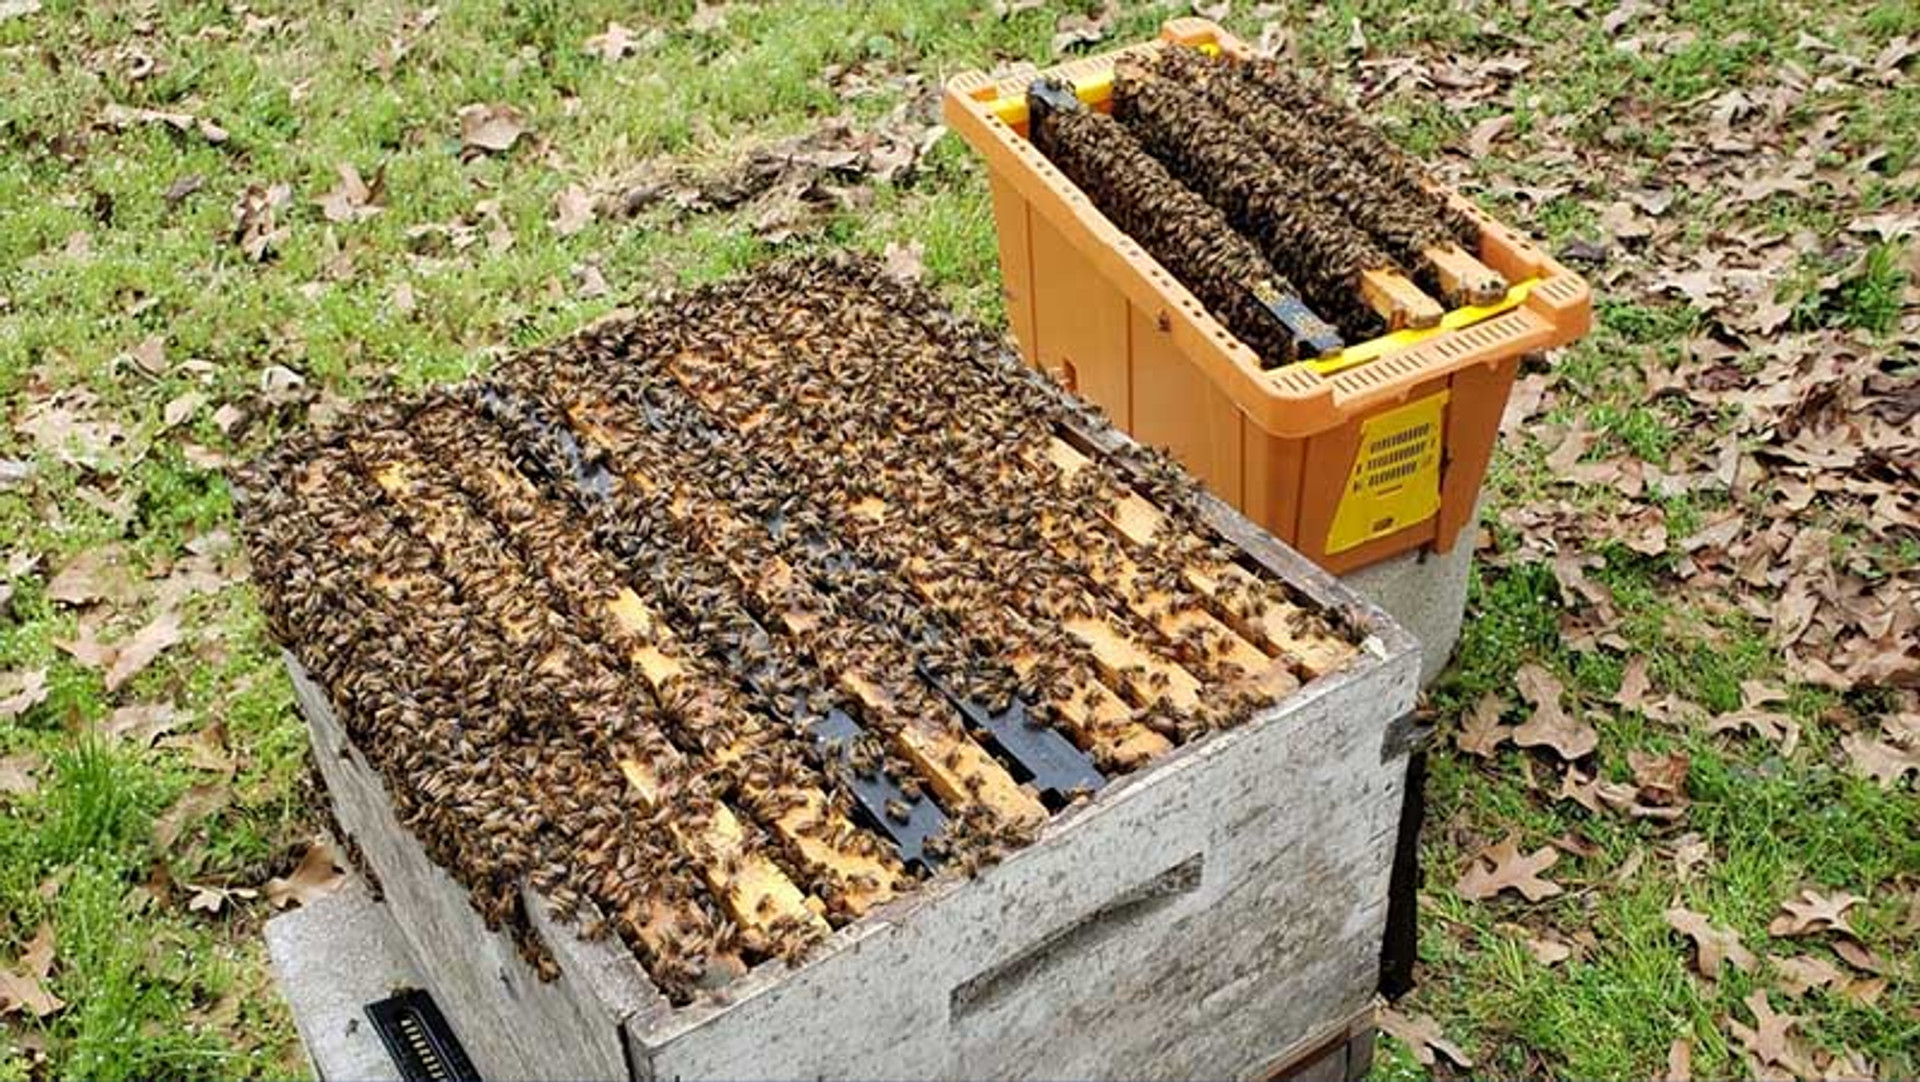
Step 2: Place the nuc immediately next to the deep hive body into which you will be installing. The deep hive body should be placed on the full or screened bottom board. If weather conditions do not allow for installation, leave them until you can install them with the entrance open.
Step 3: To prepare the deep hive body to receive the nuc, remove 6 frames from the center and place them on the side. Always remove one frame more than the size of the nuc.
Step 4: Open the lid of the nuc. You may need to use the hive tool to break the propolis seal between the lid and the body of the nuc box.
Step 5: Lightly smoke the bees across the top of the frames. This will help calm the bees.
Step 6: The next steps should be taken with slow, purposeful movements, taking extreme care to reduce the risk of harming the queen. Starting with one of the outer frames of the nuc, gently lift up and out. You may need to use a hive tool to gently break the propolis seal between frames, keep the frame over the box as much as possible and carefully move it over to the top of the hive body. Insert the frame next to the one of the empty frames in the hive.
Step 7: Transfer the remaining frames one at a time, making sure to place them in the box in the box in the exact order in which they arrived. The bees have created a brood nest in the nuc and this order should be maintained.
Step 8: If no pollen is available to the bees, place a pollen patty on the top bars. Feed the bees ProSweet Liquid Feed or 1:1 sugar mix.
Step 9: Inspect the colony 4-7 days after installation. It is not necessary to see the queen in the hive. You will see the brood in stages.
Care After Installation of Bees
Feed the bees heavily until the colony is well established (at least the first 3 weeks) using Pro-Sweet liquid feed or a 1 to 1 sugar water mix. If using sugar water you may also wish to consider adding a stimulant such a ProHealth, which prevents fermentation and is mixed with sugar water. Do not add a second deep or supers until bees have drawn out 7 to 10 frames. We recommend an in-hive Pro Feeder to ensure bees have access to feed no matter the temperatures.
**Be sure to re-check the queen in 10 to 14 days to ensure that you can see eggs and larvae present in the hive. If no eggs or larvae are present in the hive, fill out a claim on our website. Report your claim within 14 days of receiving your queen to honor our queen guarantee.
{ "@context": "https://schema.org/", "@type": "HowTo", "name": "How to Install Nucleus Colony Bees", "description": "Installing your honey bees into their new hive can be a quick and rewarding process. Follow these instructions to ensure that you and your bees are ready for the big moment.", "image": "https://cdn11.bigcommerce.com/s-dhdy1goaa7/images/stencil/1920x1280/uploaded_images/nuc-bee-installation.jpg?t=1647625271", "estimatedCost": { "@type": "MonetaryAmount", "currency": "USD", "value": "0" }, "supply": { "@type": "HowToSupply", "name": "n/a" }, "tool": { "@type": "HowToTool", "name": "n/a" }, "step": [{ "@type": "HowToStep", "text": "Make sure you're prepared for your bees! Ensure all equipment is assembled, painted and placed in the bee yard before your bees arrive. Make sure you have all the necessary equipment ready to go; protective gear is clean and ready, hive tool is near. Don’t forget to have bee feed and a pollen substitute at the ready, too!", "image": "https://cdn11.bigcommerce.com/s-dhdy1goaa7/images/stencil/1920x1280/uploaded_images/nuc-bee-installation.jpg?t=1647625271", "name": "Pre-Installation Prep", "url": "https://www.mannlakeltd.com/blog/how-to-install-nucleus-colony-bees/" },{ "@type": "HowToStep", "text": "Feed the bees heavily until the colony is well established (at least the first 3 weeks) using Pro-Sweet liquid feed or a 1 to 1 sugar water mix. If using sugar water you may also wish to consider adding a stimulant such a ProHealth, which prevents fermentation and is mixed with sugar water. Do not add a second deep or supers until bees have drawn out 7 to 10 frames. We recommend an in-hive Pro Feeder to ensure bees have access to feed no matter the temperatures.", "image": "https://cdn11.bigcommerce.com/s-dhdy1goaa7/images/stencil/1920x1280/uploaded_images/nuc-bee-installation.jpg?t=1647625271", "name": "Care After Installation of Bees", "url": "https://www.mannlakeltd.com/blog/how-to-install-nucleus-colony-bees/" }] }